Creating Problem Sets and Assignments with TINA
The following tutorial takes you step by step
through the creation of four problems and a problem set to
use in TINA's Training and Examination modes.
1) Creating a selection type problem
Start TINA.
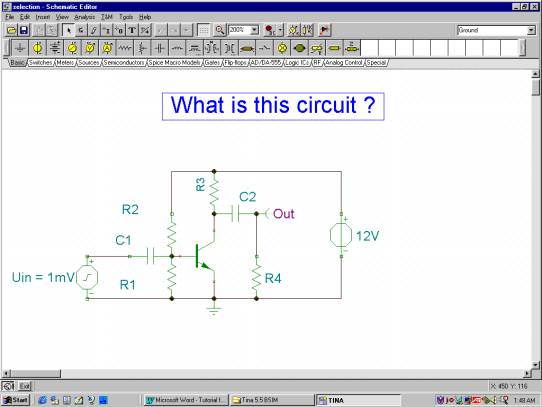
Create or load the circuit below (selection.sch).
Invoke TINA’s Exam Manager via the View
menu.
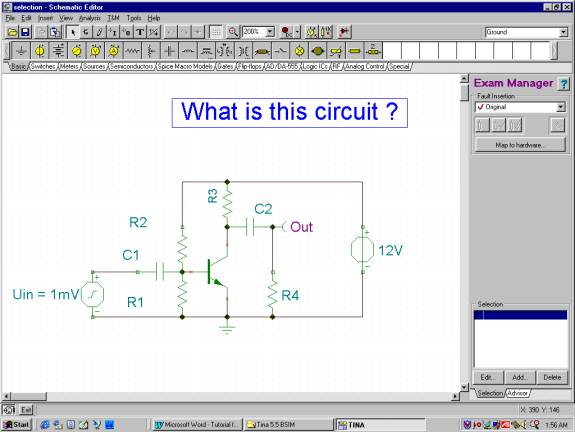
To add an alternative selection, press the Add... button.
The selection editor dialog will appear and you can enter
the desired text. If this selection is the right answer, check
the ‘This is the good answer’ field.
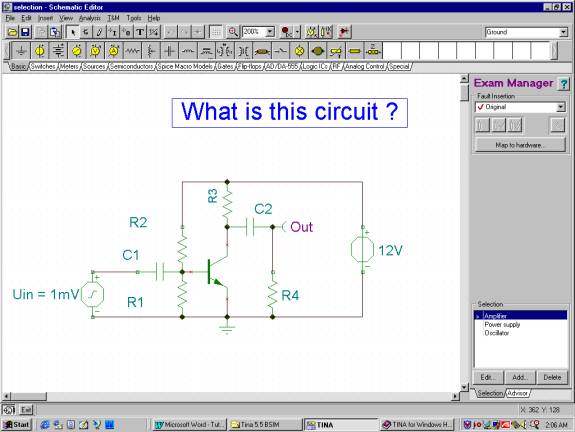
To edit a previous entered selection, press the
Edit... button. The same editor dialog will appear.
To delete a previously entered solution, highlight
it and press the Delete button.
After adding three alternatives you should see
the following screen:

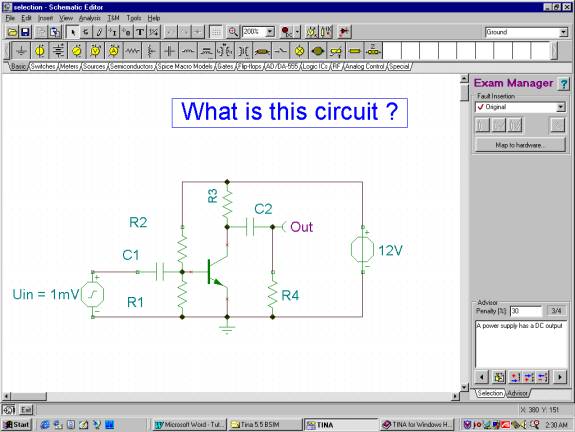
By using the advice (hint) management panel, you
can enhance the problem by adding hints for the student .
If you incorporate hints, you may want to assign a penalty
to the use of the hint. By asking for a hint with a penalty,
the student accepts a reduction of the maximum possible score.
Scores and penalties are both measured in percent.
The upper right corner of the advice manager displays
the number of the current advice and the total number of advices.
You can move among the advices with the left and right arrows.
The order of advices is important: this is the only order
in which the student will be able to access them in the Exam
Manager.
To add a new advice at the end of the advice list,
select the Advisor tab and then press the Add button. The
advice editor dialog will appear. You can enter the advice
and the penalty (in percent).
To insert a new advice before the current advice,
press the Insert button. The advice editor dialog will appear.
To delete the current advice, press the Delete
button.
To edit the current advice, press the Edit button.
Finally, save the selection.sch file in the predefined
folder called TEST under TINA’s main folder.
2) Creating a DC problem
Create or load the circuit below (DCproblem.sch).
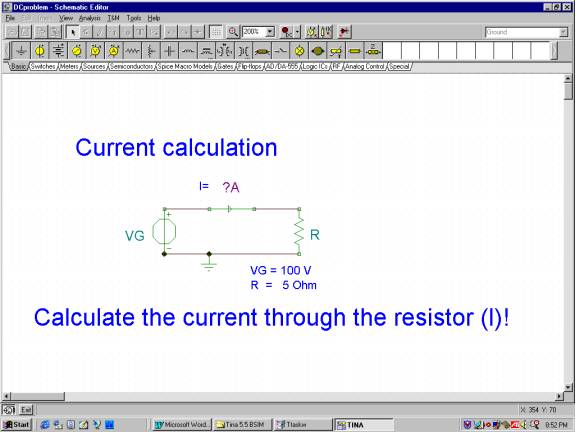
Note that the circuit contains a Current Arrow
to indicate the circuit variable whose value is to be found.
(You could also use an Ammeter.) In general, every DC problem
should have one and only one instrument for the unknown quantity.
In TINA's Training and Examination modes, instruments placed
in the circuit will not show the measured value, but instead
will ask the student for its value.
You can add hints to the problem (as described
above for selection problems). When done, save it in TINA's
TEST folder.
3) Creating an AC problem
AC problems are very similar to DC problems, but
of course will contain sinusoidal excitation and reactive
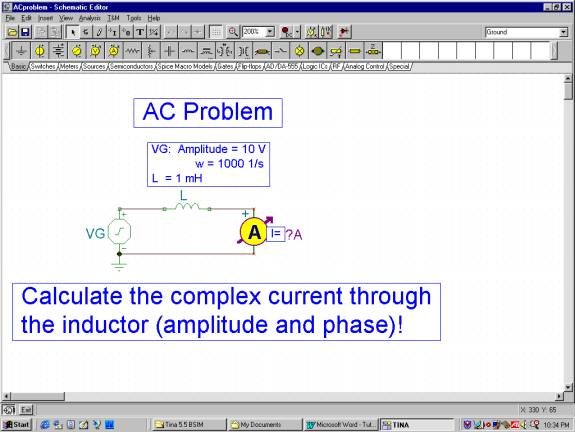
components. In Training and Examination modes, the program
will ask for the magnitude and phase of the value indicated
by the instrument. As an example, create or load ACproblem.sch
shown below, or a similar problem, in TINA's TEST folder.
4) Creating a troubleshooting problem
Create or load the circuit below (DCtroubleshooting.sch),
and invoke the Exam Manager from the View menu.

Using the listbox (displaying "Original" at the
top), create a new version of the circuit on the top of the
exam manager. Note that if you just load the existing DCtroubleshoot.sch
file, Version #1 will already exist. Now you can insert faults
in any component using the left-most button below the version
listbox. Press the button, and the cursor will change into
a screwdriver symbol. Move this cursor over the required component
(R1 in our example) and click on it. The Property window of
the component will appear. Scroll the property window downward
until you see the Fault line. Now click the left field of
this line. A small listbox will appear where you can select
from the allowed faults for this component. For our example,
select Open (open circuited component).
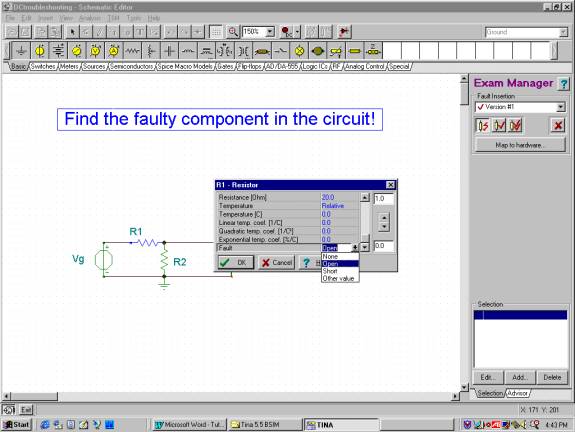
Press OK on the Property box. You have inserted
a fault in this circuit. You can continue making other versions
of the circuit with different faults. TINA will present these
alternative versions randomly in the Training and Examination
modes (but see below).
Finally, using the listbox at the top of the Exam
Manager, switch back to the Original version and save the
circuit as DCtroubleshoot.sch in the TEST folder.
5) Assembling problem sets for the Training
and Examination mode of TINA
In order to use problem files in TINA's Training
and Examination mode, they must be collected into problem
sets. In Training and Examination mode, TINA will load one
problem set at a time. The student is free to select and solve
problems from the loaded set.
Let’s collect the four problems created
above into a new problem set.
Start the Task List Editor from the TINA folder.
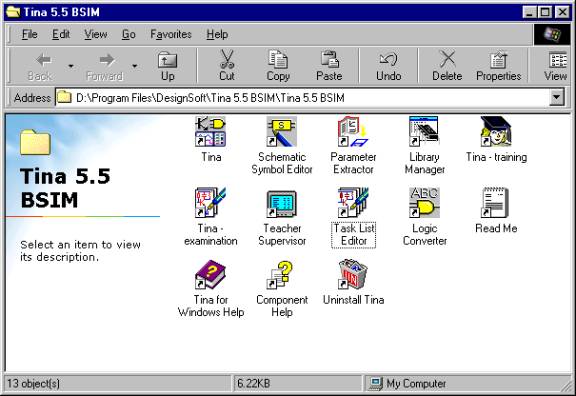
The following window will appear:
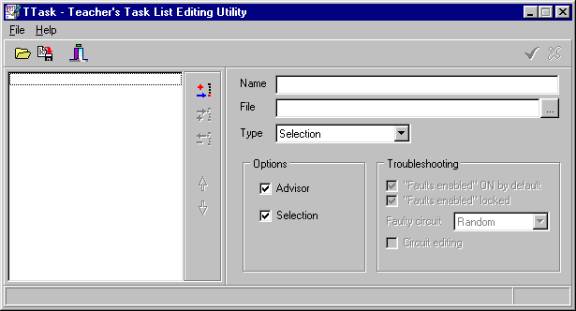
Press the Add Task button just left of the Name
field. The default name of the first task will appear.
Change that name to <What is this circuit?>
(Note that the left and right arrows will not appear when
the problem set is used.)
Press the … button next to the File field
and select test\selection.sch
Leave problem Type set to Selection.
Leave the Selection checkbox checked.
You have added the first task.
Press the Add Task button again.
Change the name of the task to DC Problem and
select the file test\DCproblem.
Set Type to DC problem.
Uncheck the Selection checkbox.
Change the name of the task to AC Problem and
select the file to test\ACproblem.
Set Type to AC problem.
Uncheck the Selection checkbox.
Now add the last problem, a troubleshooting type
problem, to this set.
Press the Add Task button again.
Change the name of the task to Troubleshooting
and select the file test\DCtroubleshooting.
Set Type to Troubleshooting.
Uncheck the Selection checkbox.
Using other troubleshooting parameters:
Faults enabled “ON” by default:
Any faults placed in components are enabled in TINA in the
Training and Examination modes.
Faults enabled locked: If checked,
the student cannot disable faults. If not checked, the student
can disable them using the Analysis/Faults Enabled menu item.
Faulty circuit: If you select
Random, the program will randomly select from the circuit
versions Otherwise, you must select a circuit version (e.g.,
version # 1), and this version will be used in the Training
and Examination modes.
Circuit Editing: If checked,
the circuit can be edited in the Training and Examination
modes.
Finally, save the problem set in TINA's test folder
as tutorial.exa.
To verify this problem set, restart TINA using
the TINA Training or TINA Examination icons in the TINA folder
and load tutorial.exa. The problem set will appear.
Let’s run through the problems to confirm
their accuracy.
1) If you doubleclick on the first task, the following
screen will appear.
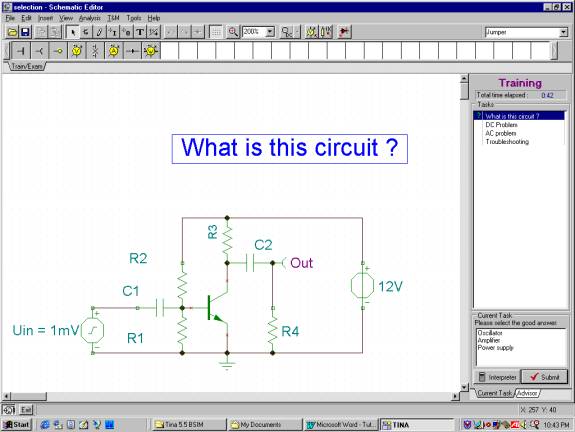
Select "Amplifier" from the list of
alternative solutions and press the Submit button.
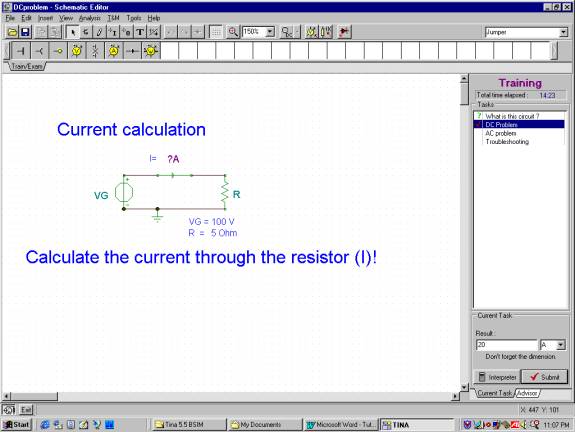
2) Doubleclick on DC Problem.
Enter 20 or VG/R into the left field and A into
the right field of Result: and press Submit.
3) Doubleclick on AC Problem.
To give the magnitude part of the answer, enter
10 in the value field and select or enter A into the unit
field. To give the phase part of the answer, enter -90 and
Deg into the appropriate Phase fields. Press Submit.
4) Doubleclick on the problem "Troubleshooting."
Press one of the buttons with the screwdriver
icons, move over R1 with the screwdriver, click, and press
Submit.
Now that you have verified all the problems, select
File/Exit and answer Yes in the “Exit Exam Session”
dialog box.
Finally, let’s use the Teacher Supervisor
program to check your performance.
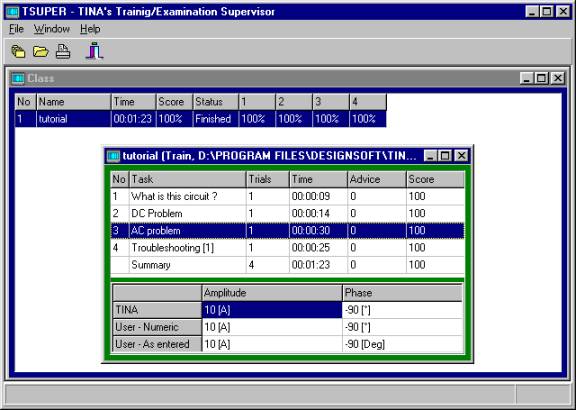
Note that with the Teacher-Supervisor program
you can follow the whole class as it proceeds with the solution
of a problem set. You can also supervise the problem solving
efforts of all users in a network environment.
|